Disclaimer
This map is prepared for the inventory of real property found within this jurisdiction, and is compiled from recorded deeds, plats, and other public records and data. Users of this map are hereby notified that the aforementioned public primary information sources should be consulted for verification of the information contained on this map. Orange County and its mapping and software contractors assume no legal responsibility for the information contained on this map or in this website. This map and information are NOT of land survey quality and are NOT suitable for such use.
Data Effective Date:
Basic Navigation
- Drag to pan
- SHIFT + Click to recenter
- SHIFT + Drag to zoom in
- SHIFT + CTRL + Drag to zoom out
- Mouse Scroll Forward to zoom in
- Mouse Scroll Backward to zoom out
- Use Arrow keys to pan
- SHIFT + Double Click to Center and Zoom in
- Click to Identify Features
- + key to zoom in a level
- - key to zoom out a level
Toolbar

 Click on the Zoom In tool on the toolbar and then drag a rectangle of area where you want to zoom.
 Clicking on the Zoom Out Button allows you to draw a box on the map and the map will zoom out by the ratio of the extent of the box to the extent of the map.
 Click on the Pan tool on the toolbar and then click on the map to move in the direction you want to go. You move the mouse in the opposite way from the direction that you want to go, so if you want to move the map east you click on the right part of the map and drag you mouse left, moving the map right.
 Clicking on the Zoom Full Button zooms the map out extent of the county.
 Clicking on the Zoom Previous Button zooms the map to your previous extent.
 Clicking on the Zoom Next Button zooms the map to your Next extent if you had previously clicked the Previous button.
 Clicking on the Clear Button, clears all the map graphics on the map and removes any search results that you may have had in the Report or Results window.
 Clicking on the Print Button brings up the print dialog. (See printing topic for more details)
More Map Viewer Tool
Identify Tool 
- Click on the Identify Tool on the toolbar and then click on the location on the map where you want to find GIS data. The Identify results appear on the left panel, in the Report window.
- In order to identify features on the map the layers need to be turned on.
Measurement Tool 
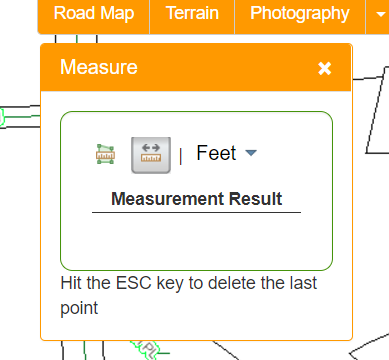
- Choose your Tool (Area or Distance)
- From the drop down menu on the right select the output units you would like. The default is feet.
- Start by clicking on the map
- Double click on the map when you want to finish.
- You can change the unit of measurement when you have completed the shape and the tool will display the new unit of measurement below
- If there is a feature selected on the map which is a polygon, the measurement tool may not work correctly. In this case, if you click on the polygon the click will not register as a measurement click because the GIS Viewer is expecting the map click to be a click on the selected feature.
Cordinate Tool 
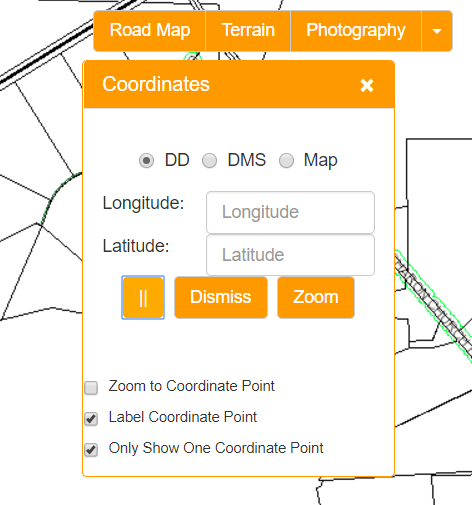
- The zoom to X/Y coordinate tool allows you to enter a coordinate and zoom to it
- You can enter the coordinates in either North Carolina State Plane NAD 83 Feet (which is the coordinate system that our GIS Data is collected and stored in)
- You can also enter the coordinates in Decimal Degrees or Degrees Minutes Seconds
- Use the radio buttons at top to select determine which method of entering the data you want to use.
- You can also use this tool to retrieve a map coordinate from the map when you click on it.
- Just click on the map and it will populate the control with your coordinate
- You can use the radio buttons at top to navigate between the display methods(State plane, Decimal Degrees and Degrees-minutes-seconds)
- By clicking on the options button you have a few controls that determines how the tool operates
-

- You can change whether the tool zooms to the coordinate point that you clicked on the map. The default of this tool is to not zoom.
- Another option is whether or not you want to label the point that you entered or clicked on. The default is to label the point.
- Another option is whether or not you want to only allow one point. The default is to only show one point, but you can uncheck this option to allow more that one point to show on the map, for instance, if you want to show the coordinates or each point on a parcel.
Note: All the coordinates are NOT survey quality and therefore only approximations.
Google Streetview Tool 
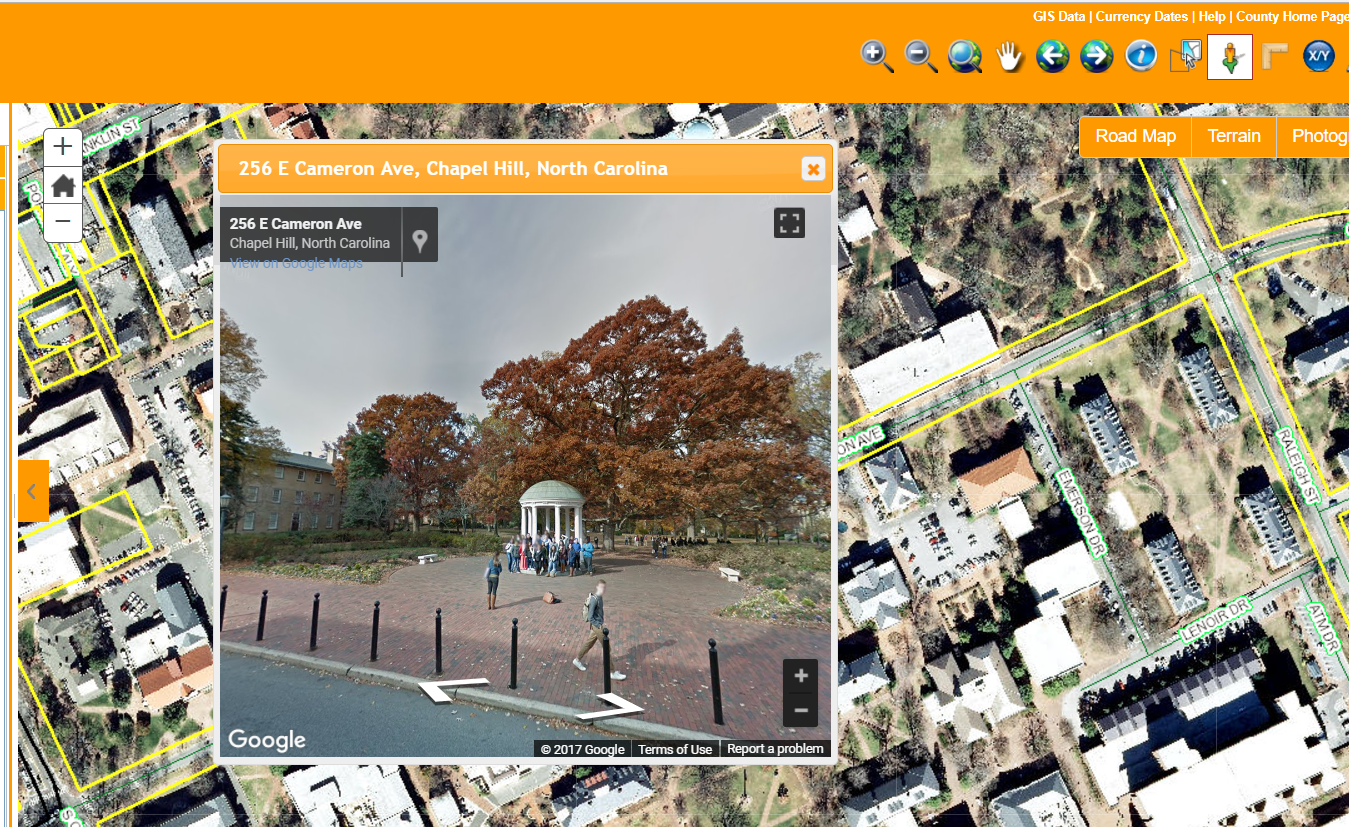
Click on the Streetview Tool in the toolbar and then click along a road in the map. A dialog box will show up in the center of the screen with the streetview imagery if there are some available for the location. You can resize the window and drag it anywhere on your desktop. To change the location of the streetview, click on the map again at a new location or navigate using the built in Google Controls. Follow the link for more information on how to use Google Streetview
All the images in this tool are property of and collected by Google, Inc and NOT by Orange County.
This tool can be moved around and or enlarged or reduced.
- By Default, the tool comes up in the center of the screen
- You can move it around, by click on the header and dragging it to where you want it to be displayed
- To enlarge or reduce the dialog, you can grab the it anywhere along the bottom of the dialog and either move it in or out to change the size.

Note: For most roads in the county Google has created streetview images. However not all roads have been driven. If the dialog window comes up with a blank image then you may have to select a new location.
It is also important that you must click on a road. If you click too far away from a road you will also get the 'No Image Available' message.
This tool was developed using Google Streetview API.
Draw Tool 
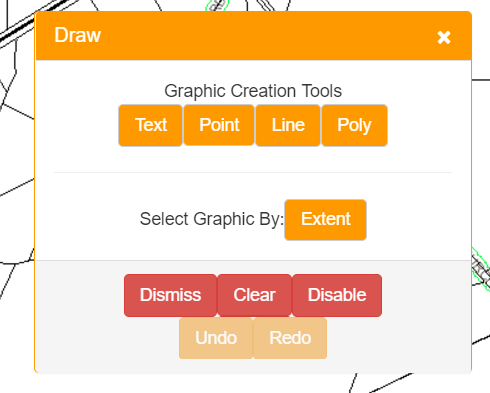
Draw Tool allows users to add lines, polygons, points and text to the map
Printing
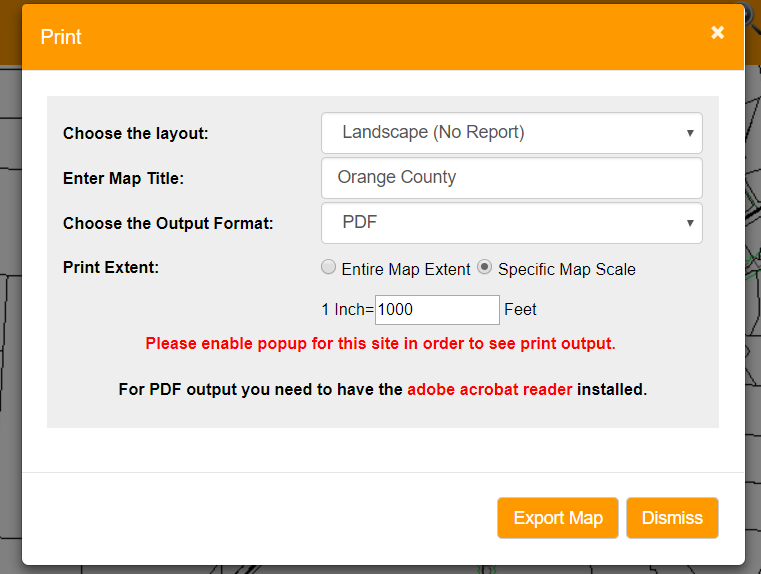
If no features are selected in the map, the print dialog will only show you the print layouts available that do not include a data report
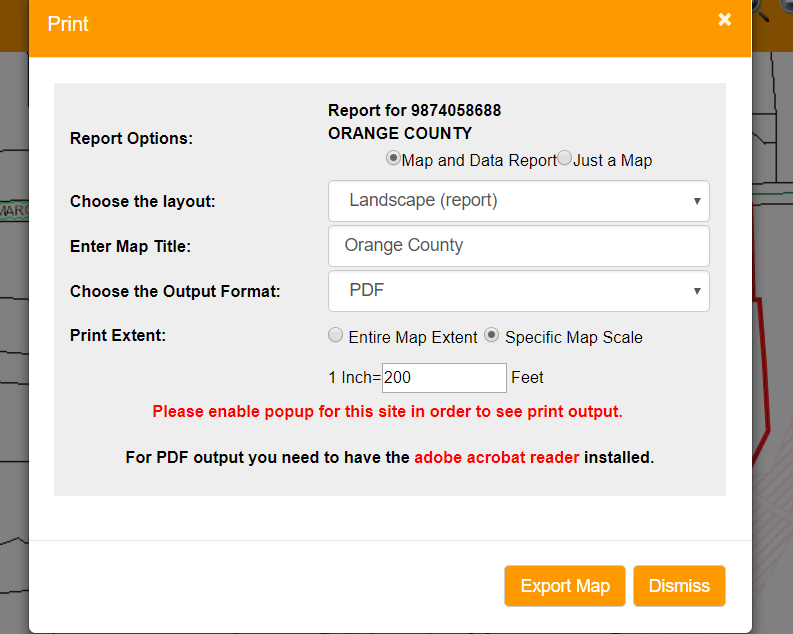
If you have a selected feature in the map and that feature type that has a report, in this case Parcels, then the print dialog will display both the standard print layout without a report and the print layouts with a report.
- Enter a title, choose a layout format and output format
- The map scale is set to the current scale of the map.
- All print reports will open in another tab, so you need to have popup blockers diabled for this site. Please see the documentation for the browser that you are using to determine how to enable popups.
- The default output format for the print layout is PDF
Searching for Information
Basic Searches
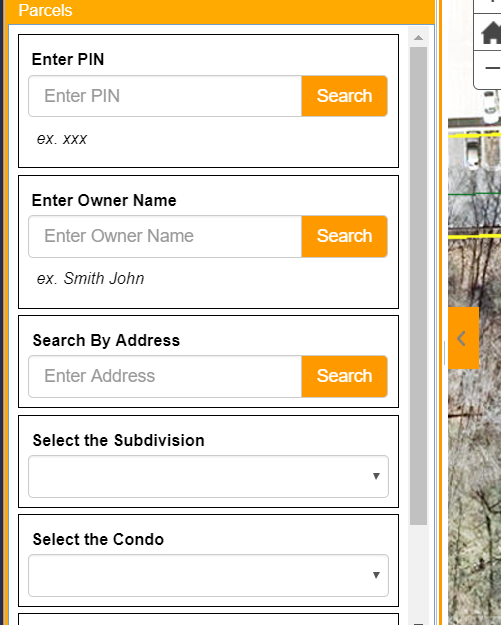
The Webviewer's primary focus is looking up parcel information, so the initial search panel has some common searches for looking up a parcels
Default Search- Enter the name in last name first
- Do not include a common between the last and first names
- A list of possible choices appear in the autocompletion box below the input box.
- You can either choose one of that list for a narrow search
- Or hit enter to do a wildcard search on the value you have typed.
- This is the unique id for our parcel data
- It is a ten digit number
- If the parcel has condominiums, then the condo's PIN number is the ten digit parcel number plus a three digit sub PIN.
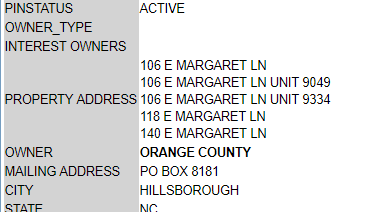
- This is a two part search. Initially the application searches the Address dataset for all addresses that match the search string
- If an address is found or choosen, the application then searches the parcel that contains that address point and display the parcel information
- If a parcel has multiple addresses, a list of addresses are displayed in the Physical Address column
- This search allows user to select a subdivision from our master subdivision dataset and then select all the parcels that are part of that subdivision.
- This search allows user to select a condominium from our master condominium dataset and then select all the parcels that are part of that condominium.
- This search the parcel dataset by a neighborhood code.
Sales Analysis Tab
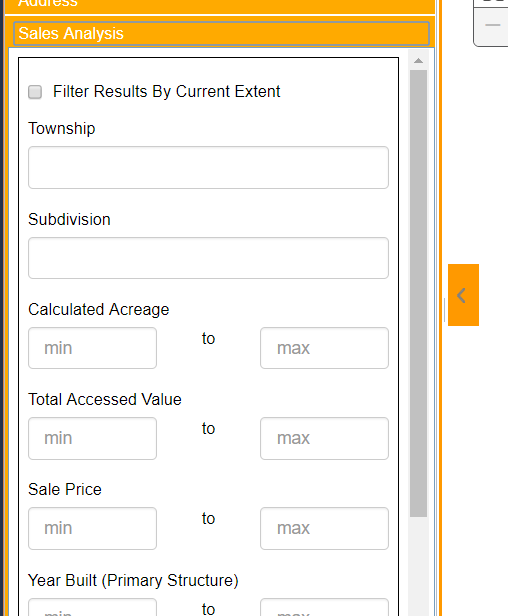
The Webviewer's primary focus is looking up parcel information, so the Advanced search panel is targeted to look for parcels using some of the other more common fields in our GIS System.
Notes
- Assessed Value is a numeric field, so please do not use characters in the search
- Clicking the Sales Analysis search button will bring up a dialog where you can search by multiple fields. If the buttons are not visible in your browser window you can scroll down using your mouse or the down arrows.
- This dialog is also available when you click on the "Select by Location" tool in the Details panel. This type of search allows the user to create a buffer around a parcel or structure and select all the features that match the query within the buffered area.
Buffer Tab
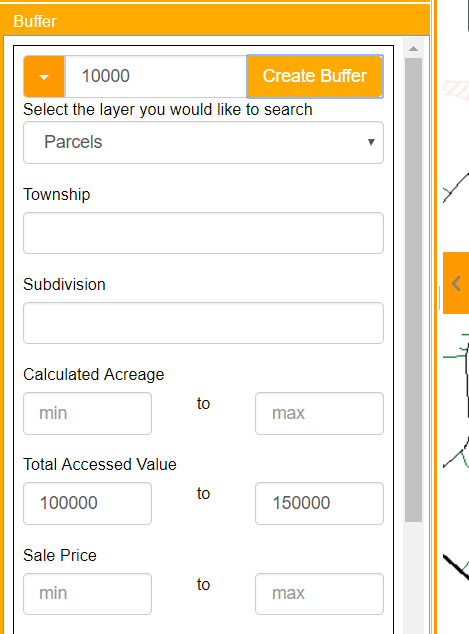
When you identify a parcel, if you click the "Tools" button at the buttom of the Detail panel, the application displays a list of tools that are available for this parcel. One of the tools is named "Select by Location". This tool allows users to buffer a parcel by a distance and query features based on a query.
Address Search Tab
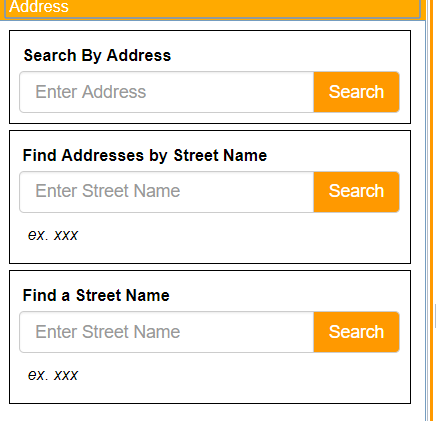
Search for an Address or Street
Search by Address
- This search looks for an address in the county address database
Find Addresses by Street Name
- This search looks in the Orange County Master Street Name dataset for a list of street names.
- Once you select a street name from the list, the search will bring back a list of the addresses located on that street.
Find a Street Name
- This search searches the master street dataset for a list of unique street names
- Once you choose a street name, the application brings back all the street centerline segments that are associated with that particular street name.
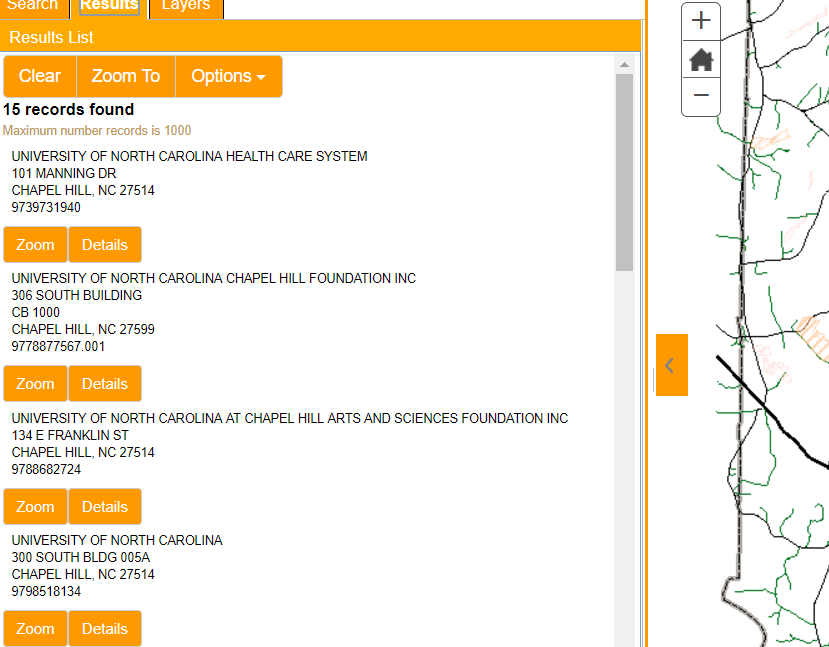
Search Results Panel
From a selected subdivision, you can then select the parcels in the subdivision

Once you execute a search, the search results will display in the Results Panel.
- Only 2500 records can be selected at a time
- You can export the records to a csv by clicking on the excel icon in the search results toolbar
- For parcels, we have formatted the results in a simplified manner, so to see all the data items for a parcel you'll need to click on the details link
- For other data, the results will be presented as a grid
- You can view the records as a grid dialog that displays in a modal window by clicking on the grid tool in the search results toolbar
- If only one record is found, the application will display the details panel by default
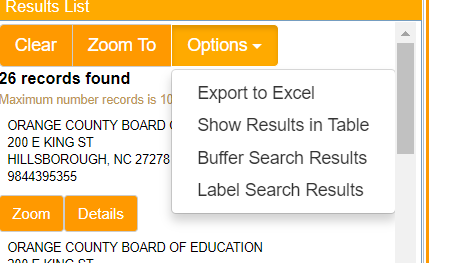
Tool menu for search results
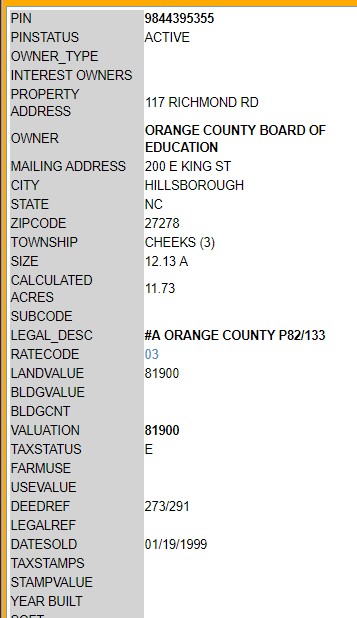
Details Panel
The details panel display a single record in the database with all the fields
- You can either use the search tools or the identify tools to view records in the details panel
- If you are using the identify tool and you select more than one data item, the panel will have navigation buttons on the top of the panel to let you go through each record that you selected
- All results have a zoom to button and the feature will be highlighted on the map
- All results also have a clear button that clear the search results and the detail panel (this is the same as clicking on the clear button on the main toolbar)
- For a few layers, we allow you to buffer the feature and search for parcel that meet the criteria of the buffer (see buffer tool below)
- For Parcels, we also have an Adjoiners tool that will select all the parcels that touch the selected parcel
Also for Parcels there are a few additional tools at the bottom of the Details Dialog
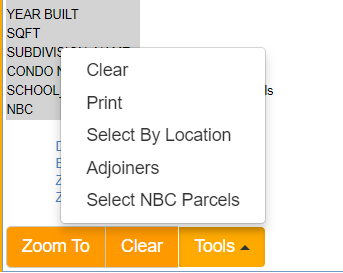
- Buffer Tool - Search Parcels by a query and/or a distance from the selected parcel
- Mail to - Opens a dialog revealing the link that you can use to come directly to the selected parcel. Just copy and past that link into your browser window or email.
- Tax Card - This will bring up the tax card with more detailed information about the parcel.
- Print - This brings up the print dialog. With a selected parcel you have the option of getting a print out with a map and a data report.
Map Layers
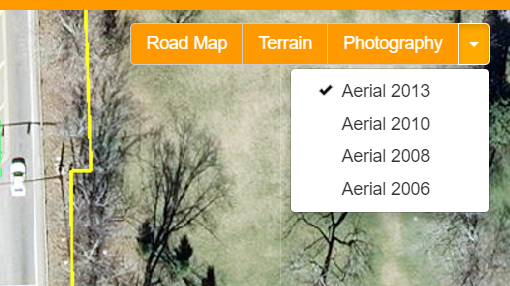
Basemaps
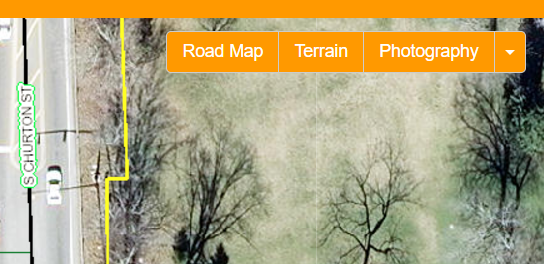
You can change the basemap by clicking on the basemap buttons on the top right corner of the map.
These layers are always the bottom layer in the map
Additional years of Orthophotography can be accessed by using the dropdown button on the right side of the tool.
Additional GIS Layers
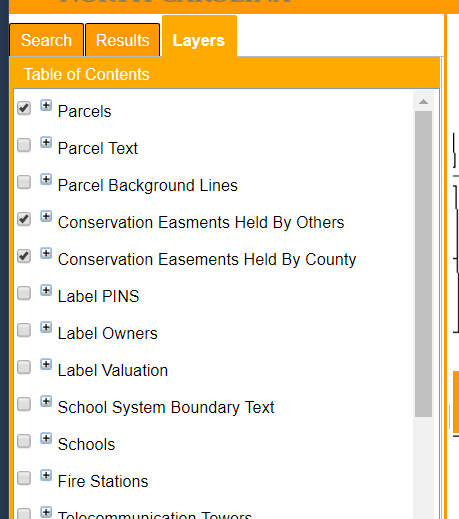
You can turn on and off any other layer in the map by using the table of contents panel.
For some layers, we allow you to adjust the transparency of the layer. Just use the slider bar to make the layer more or less transparent.
A legend will display below the item in the table of contents
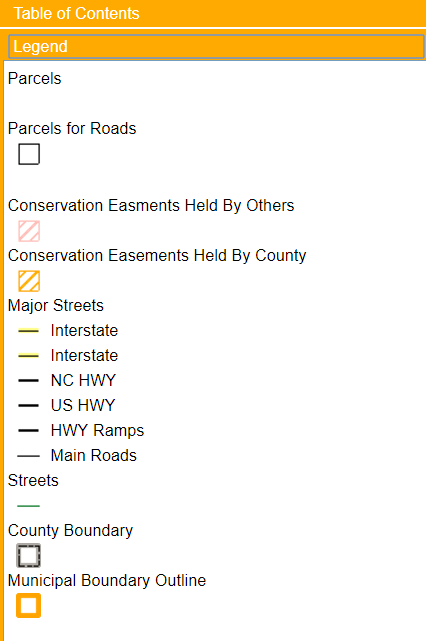
To see the legend without all the other control items, choose the legend panel in the Layers Tab
Additional Notes
In the desktop version of the Map Viewer, the information is normally displayed in the side panel. You can change the size of the side panel by moving your mouse to the area between the map and side panel. Once you see the splitter icon you can move the divider right or left to increase or decrease the size of the panel.
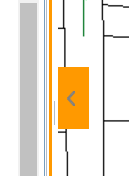
Use the Toggle Panel button on the side of the map to hide or show the side panel.
Note: If you identify a feature on the map, it will reopen a closed side panel to enable you to see the information.
Mobile Devices


- Use the main menu to navigate the tools for the mobile version
- Basemap Layers section - allows you to toggle any of the basemap on or off
- Goto section - allows you to manage overlay layers, see legends, search for a feature or see search results
- A stripped down number of tools include the Identify, Measurement and Coordinate tool